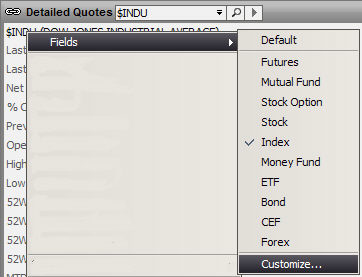
To access the Customize Fields option, right click inside the Detailed Quotes window. Click the Fields option, then click the Customize option.
The Define Detailed Quote Fields pop-up window displays.

To add a field, do the following:
Click on one of the options in the Unused Field list.
Click the Add button. The new field appears in the Selected Fields list.
To add all of the fields to the Detailed Quotes, do the following:
Click in the Unused Fields list.
Click the Add All button. All of the fields are moved to the Selected Field list.
To remove a field from the list, do the following:
Click on one of the entries in the Selected Fields list.
Click the Remove button. The field appears in the Unused Fields list.
To remove all of the fields to the watch list, do the following:
Click in the Selected Fields list.
Click the Remove All button. All of the fields are moved to the Unused Fields list.
Once you have the desired fields selected it is possible to save the layout using the Save As command.
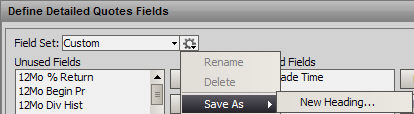
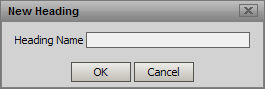
If Default is chosen then the layout will become the default and will be applied to every Detailed Quotes window that is opened. If New Heading is chosen then the user will be prompted to name the new layout.
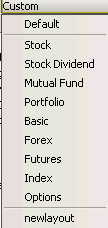
It can then be chosen from the fields in the Define Detailed Quotes Fields window Custom pulldown
When done, save the workspace.
Beware when you use Remove All and the Add All options. If you make a mistake and delete all the columns in a Custom Detailed Quotes view, Exit FutureSource without saving, and if you had previously saved the Custom layout it will be available to you upon logging back in.